When you configure your D-Link UTM Firewall to send log data to USM Appliance, you can use the D-Link UTM Firewall plugin to translate raw log data into normalized events for analysis. The table below provides some basic information for the plugin.
| Device | Details |
|---|---|
| Vendor | D-Link |
| Device Type | Firewall |
| Connection Type | Syslog |
| Data Source Name | D-Link UTM Firewall |
| Data Source ID | 1898 |
Integrating D-Link UTM Firewall
Before you configure the D-Link UTM Firewall integration, you must have the IP Address of the USM Appliance Sensor.
To configure the D-Link UTM Firewall to send log data to USM Appliance using the Syslog protocol
- Log in to the firewall. After logging in, set your firewall’s WAN settings as required by your Internet provider and your organization's own guidelines.
Note: The default URL used to access the firewall is https://192.168.10.1. The default username is admin and password is admin.
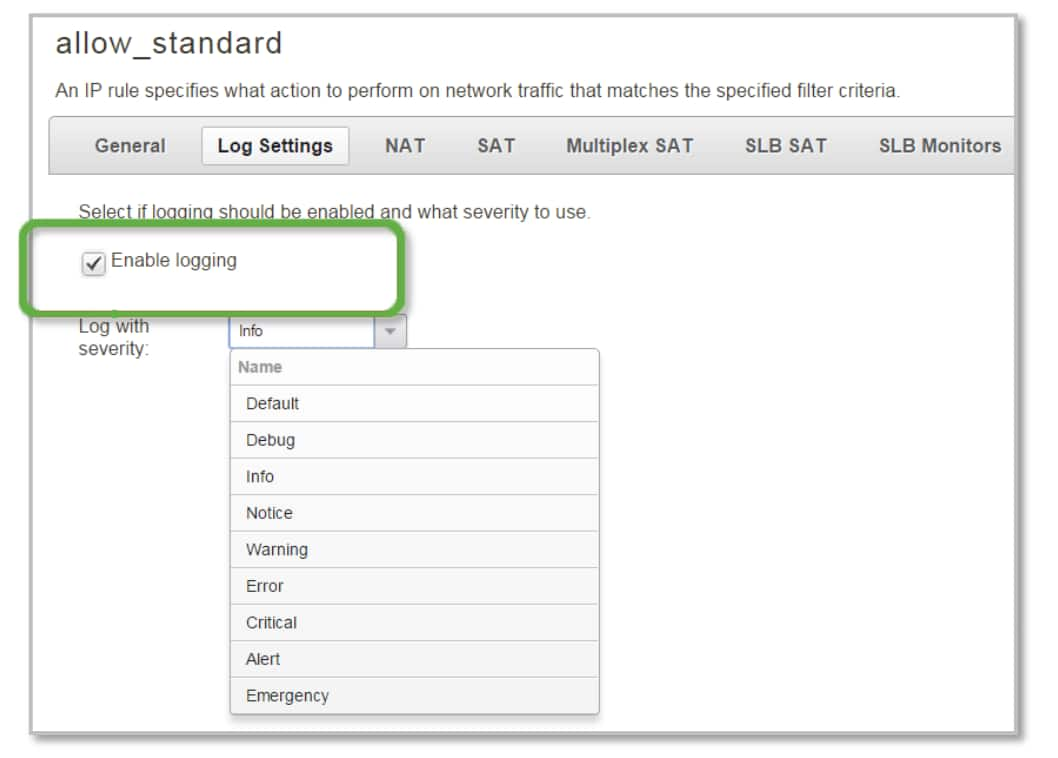
- Enable logging for the desired IP rules. To monitor outgoing traffic, you need to enable logging in the main NAT rule. To do that, select Policies > Main IP Rules > lan_to_wan > edit the “allow_standard” rule from the D-Link admin program and select the “Enable logging” check box on the Log Settings tab page.
- Specify the server to receive log and event information.

Plugin Enablement
For plugin enablement information, see Enable Plugins.
Additional Resources and Troubleshooting
https://www.manualslib.com/download/663992/D-Link-Netdefend-Dfl-210.html
https://www.manualslib.com/manual/663992/D-Link-Netdefend-Dfl-210.html#product-DFL-860
For troubleshooting, see the vendor documentation.

 Feedback