 Role Availability Role Availability
|
 Read-Only Read-Only
|
Investigator |
Analyst
|
 Manager Manager
|
To enable USM Anywhere to monitor your Microsoft Azure subscription, you must create an application that grants permission to USM Anywhere to fetch data using the Azure software development kit (SDK) and Azure Representational State Transfer (REST) API. USM Anywhere requires the following credentials:
| Azure Credential | USM Anywhere Field Name |
|---|---|
| azure_tenant_id | Azure Tenant ID |
| azure_subscription_id | Azure Subscription ID |
| azure_application_id | Azure Application ID |
| azure_application_key | Azure Application Key |
The following instructions focus on the requirements for USM Anywhere. See Microsoft documentation for detailed steps and descriptions to register an application using the Azure portal, including a video demonstration.
Important: You must have global administrator privileges to create an application and obtain credentials.
Obtain the Azure Subscription ID
The subscription identifier (ID) is required when you complete the Azure Credentials step of the sensor setup in USM Anywhere.
To get the Azure subscription ID
- Log in to the Azure portal (https://portal.azure.com).
-
From the Azure Dashboard, select your subscription.
-
From the Subscription page, copy your subscription ID and save it somewhere that you can access later.
Create the Application in Azure
To allow USM Anywhere to access Azure resources, you must first set up an Azure Active Directory (AD) Active Directory (AD) is a directory service that Microsoft developed for Windows domain networks. application and complete the Azure standard procedure for adding a new application registration. Then you can create a client secret for Azure AD.
To create the application in Azure
-
Log in to the Azure portal (https://portal.azure.com).
- Go to Azure Active Directory > App registrations > New registration.
- Enter a name for the application.
- In Supported account types, select Accounts in any organizational directory (Any Azure AD directory - Multitenant).
- Click Register.
-
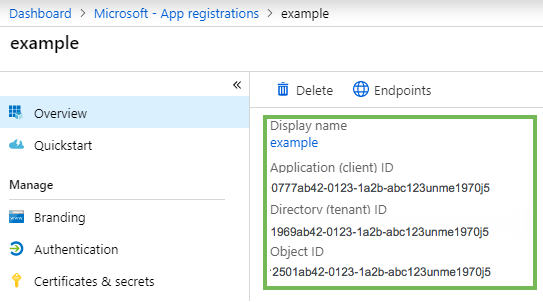
After the application is created, you can locate the application(client) ID, directory (tenant) ID, and object ID needed to complete the Azure Credentials step of the sensor setup in USM Anywhere.
-
Go to Certificates & secrets and click New client secret.
-
Enter a description for the secret and select a duration.
-
Click Add.
The value displayed in the Azure portal is the Azure Application Key used by USM Anywhere.
Important: Copy this value and save it because you won't be able to copy the key later.
Grant API Permissions
To let your application collect user information in your Azure environment, you need to grant Microsoft Graph API permissions.
To grant API permissions
- Log in to the Azure portal (https://portal.azure.com) and select your application.
-
Go to API Permissions and click Add a permission.

-
Select Microsoft Graph.
-
Select Application permissions and then User.Read.All. Use the search function to help locate the permissions.

-
Click Add Permissions.
-
These permissions require admin approval, so make sure to click Grant admin consent for.


Associate the Application with the Entire Subscription
If you want to use USM Anywhere to monitor all of your Azure resources, you should associate it with your Azure subscription as a whole.
To associate the application with the entire subscription
- Log in to the Azure portal (https://portal.azure.com).
- Go to More Services > Subscriptions, locate the subscription, and select it.
-
Select Access control (IAM) in the navigation list.
This displays the roles and permissions for the subscription.
")
-
At the top of the page, click Add.
-
Select the Reader role (recommended).
This role allows assigned users to fetch new Azure logs.
Warning: You must select the Contributor role if you want to collect Microsoft Internet Information Services (IIS), Azure SQL Server, or Windows logs.
This is not recommended unless you require the additional log collection listed here.
- Select the application you created previously to assign the role to the subscription.
-
Click Save and OK.
")
 Feedback