 Role Availability Role Availability
|
 Read-Only Read-Only
|
Investigator |
Analyst
|
 Manager Manager
|
To use the BlueApp for Salesforce in USM Anywhere, you first need to log in to Salesforce to create the connected app and obtain the appropriate credentials. Because the account used to create the app will be responsible for creating all the Salesforce cases and will potentially be used by multiple users, it is recommenced that you create a separate, dedicated "service account" user. This user should have only enough permissions to allow the user to create cases. Do not reuse an admin account. Multiple accounts or users on different sensors may result in duplicated cases or cause confusion.
Important: Because of the way the Salesforce API implements event log processing, events can take at least three to six hours to be processed, potentially more.
Warning: The BlueApp for Salesforce uses the Salesforce hourly event log API to pull events from your Salesforce instance on an hourly basis to minimize the latency of your important security event data. This is a paid feature and not enabled in a production Salesforce instance by default. Please ask your Salesforce Account Executive to enable it in your account if you have not done so already. The hourly event log feature is not required to use the case creation actions. USM Anywhere does not currently support importing events from the Salesforce Daily Event Log API.
Salesforce Configuration Requirements
A user with a read-only (viewer) role will not be able to view log events from other users. Refer to the Salesforce permissions guidance to configure your service account user with adequate permissions:
Creating and Configuring the Connected App in Salesforce
To create the connected app in Salesforce
- Log in to Salesforce with your username and password.
-
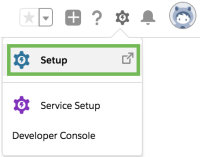
Go to the Settings Console by clicking the Settings icon.
- In the Platform Tools menu on the left, go to Apps > App Manager.
-
Click the New Connected App button at the top of the Lightning Experience App Manager header.
The New Connected App modal displays.
-
Fill out the required Basic Information fields:
- Connected App Name
- API Name
- Contact Email
-
In the API (Enable OAuth Settings) section, select the Enable OAuth Settings checkbox.
The section expands with further options.
-
Leave the Enable for Device Flow checkbox checked, do not deselect it.
The Callback URL field automatically populates the https://login.salesforce.com/services/oauth2/success link.
-
In the Available OAuth Scopes section, select the following options and click Add for each:
- Access and manage your data (api)
- Perform requests on your behalf at any time (refresh_token, offline_access)
- Select the Require Secret for Web Server Flow checkbox.
-
Click Save to complete the app creation process and then click Continue.
Note: It takes time before the Salesforce app is completely created and recognized. LevelBlue recommends that you wait at least 20 minutes before entering the credentials in USM Anywhere.
To obtain your credentials and configure the Salesforce app
- In the Salesforce Settings page, go to Platform Tools > Apps > Connected Apps > Manage Connected Apps.
-
Click the app you just created.
The page displays the Consumer ID (which you will enter in USM Anywhere as the Client ID), and the Consumer Key (which is the Client Key in USM Anywhere).
-
In OAuth Policies, make sure All users may self-authorize is selected for Permitted Users, and make sure Enforce IP Restrictions is selected for IP Relaxation.
Both should be set by default, but if not, click the Edit Policies button to change them.
- In the menu tree on the left of the screen, select Settings > Security > Network Access.
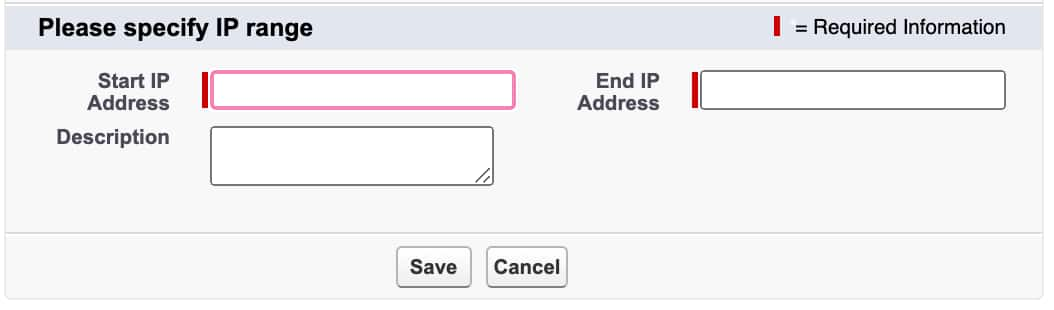
- On the Network Access page, in the Trusted IP Ranges section, click New.
-
Enter the global trusted IP range that contains the public IP address of the USM Anywhere Sensor you are using, enter a description, and click Save.

Connecting the Salesforce App in USM Anywhere
After you obtain the OAuth, you must configure the connection within USM Anywhere.
To enable the BlueApp for Salesforce
- In USM Anywhere, go to Data Sources > BlueApps.
- Click the Available Apps tab.
- Search for the BlueApp, and then click the tile.
- Click Configure API.
-
If you have more than one deployed USM Anywhere Sensor, select the sensor that you want to use for the enabled BlueApp.
BlueApps operate through a deployed sensor and use APIs to integrate with the connected third-party technology. Select the sensor that can access the integration endpoint. The HTTPS connections to the API will originate from this sensor, so it is important to make sure the sensor has network access to the BlueApp API endpoints.
- Enter the Client ID, Client Secret, Username, and Password for the Salesforce app you created.
-
In the Event Types field, you can specify the event types you want the BlueApp for Salesforce to collect.
The BlueApp for Salesforce collects a default set of event types when the field is left blank. If you enter your own list of event types into the Event Types field, then USM Anywhere will collect those event types instead of the default set.
The default event types are as follows:
ApexCallout, ApexRestApi, ApexSoap, API, AsynchronousReportRun, DocumentAttachmentDownoads, InsecureExternalAssets, Login, LoginAs,TransactionSecurity, Search
Some event types may require an upgraded Salesforce subscription. A full list of Salesforce's supported event types and details on purchasing them can be found on their EventLogFile Supported Event Types documentation page.
- Click Save.
-
Verify the connection.
After USM Anywhere completes a successful connection to the Salesforce APIs, a
 icon displays in the Health column.
 If the
 icon displays, there is a problem with the connection. The Message column provides information about the issue. Repeat the steps to fix the configuration or troubleshoot your Salesforce connection.
BlueApp Log Collection
Once the BlueApp has been configured, you can choose to have USM Anywhere collect logs from the app on a regular basis.
To configure log collection for the BlueApp
- Go to Settings > Scheduler.
- In the Job Scheduler, search for the BlueApp on the sensor to which it was deployed.
-
In the enabled column, click the
 icon for the inactive collection job.
 The
 icon turns green, and collection is enabled.
 - (Optional.) Click the
 icon to customize the frequency of the event collection.
 Feedback